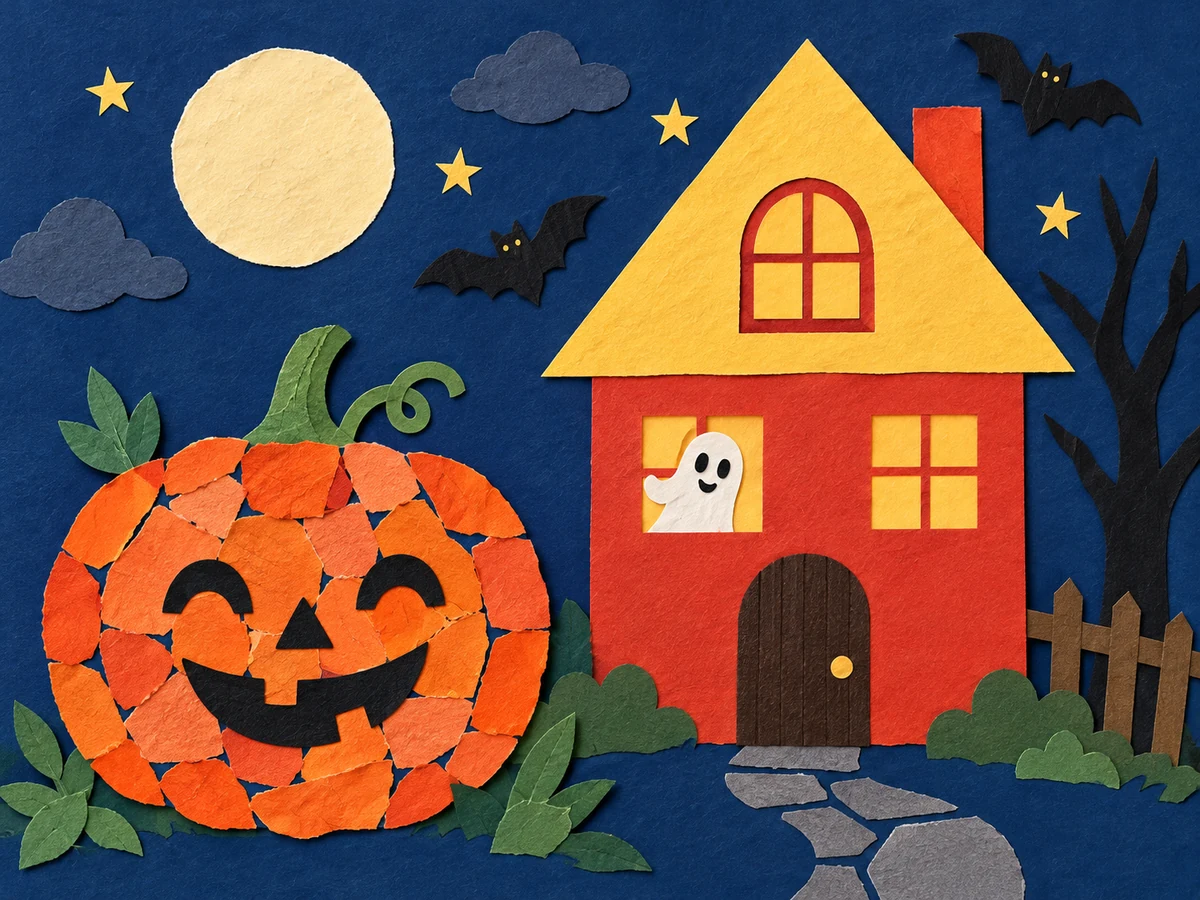
For Halloween cut-and-paste activities, choose a picture with a cutting task your child can manage: short snips for a pumpkin mosaic, paper strips for a mummy, or simple shapes for a Halloween house. Arrange the pieces before gluing. An adult can prepare some or all of the pieces, so everyone can take part in building the picture.
These three projects use ordinary paper. Start with whichever one appeals to your child; there is no need to finish all three or work through them in order.
Choose the cutting task before the picture
- Short snips: pumpkin mosaic. Cut narrow orange strips into little patches, then fill a large pumpkin outline. The patches do not need to match.
- Straight strips: paper mummy. Cut across a sheet to make broad bandages, then overlap them on a simple body shape.
- Separate shapes: Halloween house. Cut rectangles and a triangle, try a layout, then build a house with windows and a roof.
If cutting takes all your child’s attention, prepare the main shape yourself. They can make a few cuts and still have plenty of choices about where the pieces go. For a child who wants a larger challenge, let them draw the shapes before cutting them.
Set out a small paper-making kit
- A plain sheet for the background and scraps of colored paper
- A pencil and dark crayon or washable marker
- Scissors appropriate for the child and the paper
- A glue stick suitable for children, used according to its instructions
- A shallow tray or spare sheet to collect the loose pieces
Supervise cutting and take over cuts your child cannot manage. The NHS scissor-skills guidance recommends suitable scissors that can cut the chosen material and supervision when children use them. It also suggests tearing and sticking paper before scissors, and left-handed scissors for children who cut with their left hand.
Keep the cutting and arranging areas separate: scraps in the tray, background sheet beside it. Leave the glue closed until the child has tried the layout. This gives them room to change their mind without peeling pieces off.
1. Snip-and-stick pumpkin mosaic
Prepare: Draw a large pumpkin outline on the background. A wide oval with a short stem is enough. Prepare a few narrow orange paper strips; a child can snip across a strip without cutting out a whole pumpkin.
- Make the patches. Snip across one strip, collecting the pieces in the tray. Try one cut first. If the paper folds rather than cuts, check the scissors and material, or have an adult prepare the patches.
- Try a small area. Place a few patches inside the outline. Turn them, leave little gaps or overlap their corners. The picture can look like a patchwork pumpkin rather than a perfectly filled shape.
- Glue in sections. Lift a few patches, put glue on that part of the background and press the patches back down. Continue across the pumpkin, then add a stem.
- Choose a face. Draw eyes and a mouth on top once the glue is dry, or add larger adult-cut paper features. A plain harvest pumpkin works too.
Adjust it: Tear orange paper instead of cutting, or offer ready-cut patches and let your child do the arranging. If they lose interest halfway through, keep the open spaces—the pumpkin does not need a complete coating of paper.
2. Paper-strip mummy
Prepare: Draw a simple dark mummy shape on a light background: a round head above a long, rounded body. Keep the arms close to the body, or leave them out. You will glue pale paper strips across this shape.
- Make broad bandages. Draw a few straight lines on white or cream paper. Cut along the lines to make strips. An adult can cut the strips if your child would rather assemble the mummy.
- Leave a face gap. Place one strip above the eye area and another below it. Move them until there is enough dark space between them for two drawn eyes.
- Wrap the body on paper. Lay more strips across the body at different angles. Overlap some strips and leave a few dark gaps. Tear or shorten long ends before gluing; they can also extend beyond the outline for a loose, ragged look.
- Stick and finish. Glue one strip at a time, keeping the eye gap open. Add eyes with a light crayon, or glue on two larger paper eye shapes prepared by an adult.
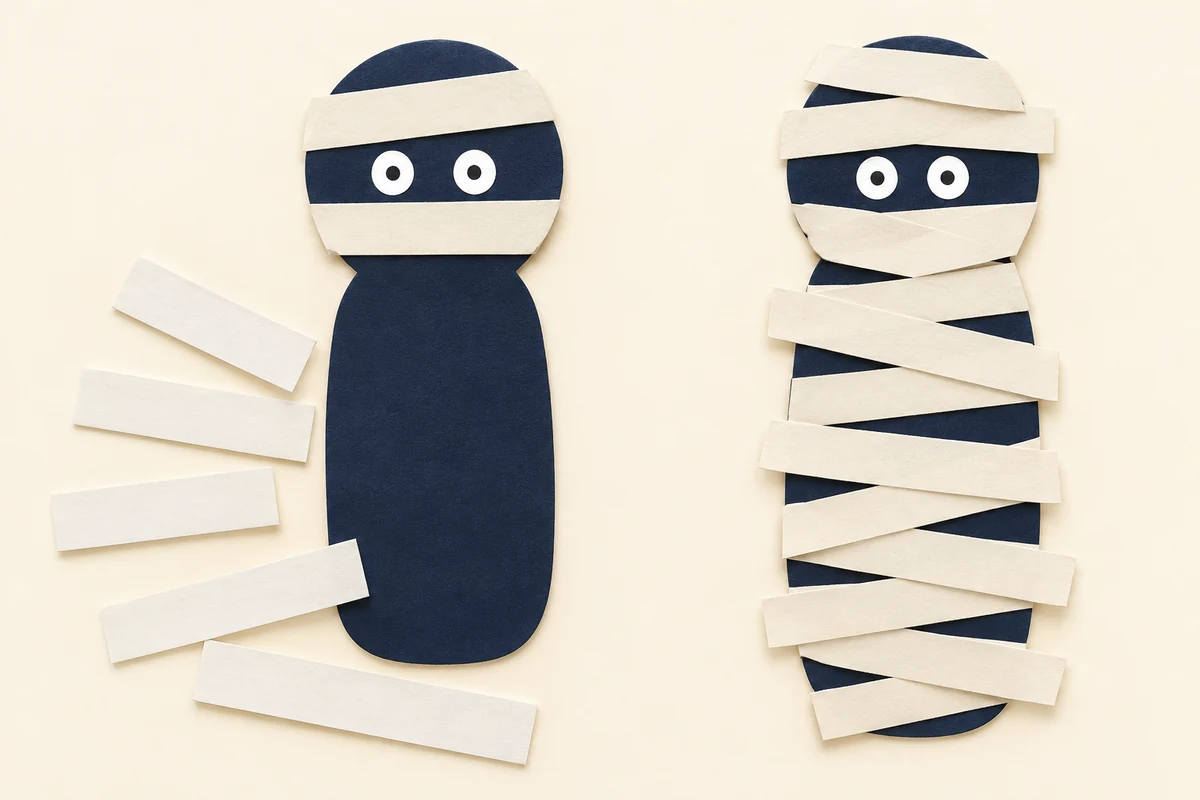
Adjust it: Use fewer, wider strips when handling lots of pieces becomes frustrating. For a more involved version, plan which bandages will pass underneath others, then glue the lower strips first. The child decides how tidy or tangled their mummy should look.
3. Shape-built Halloween house
Prepare: Choose a dark background and lighter paper for a house. Draw a large rectangle for the walls, a triangle for the roof, a narrow rectangle for the door and a few broad window shapes. Keep the windows large enough to handle comfortably.
- Cut the main shapes. Start with the wall rectangle and roof triangle. Cut the smaller pieces afterward, or ask an adult to prepare them.
- Build without glue. Put the walls on the background, slide the roof above them, and try the door and windows in different places. Check that the roof reaches across the walls.
- Glue from the back forward. Stick down the walls and roof first. Add the door and windows on top. Leave a window crooked if that is part of the house your child wants.
- Add the Halloween detail. Draw a ghost looking through a window, a moon in the sky or a pumpkin beside the door. Drawing these details avoids another round of small paper pieces.
Adjust it: Offer the two main shapes already cut, with windows drawn directly on the house. A child who enjoys planning can sketch the whole house first and work out which paper shapes they need.
Fix the sticking points
- Pieces keep moving: settle on a small section, then glue only those pieces. Keep the rest in the tray.
- Paper sticks to fingers: try applying glue to the background rather than to each small patch. Follow the glue’s directions for drying.
- The cutting line is hard to follow: make the next shape larger, offer a shorter line or prepare that piece yourself.
- The picture feels unfinished: ask what the child wants to add. A drawn detail can finish it without more cutting.
If your child wants a character they can move afterward, our Halloween paper puppet guide explains backing and handles. For using a paper activity during a small celebration, see the Halloween party plan.
Using a printable cut-and-paste page
A printable can supply the outlines when you would rather skip drawing them. Look at the cutting lines and piece sizes before handing over the page, and choose which cuts an adult will do. Our A4 and US Letter printing guide can help with paper-size settings.
For an optional ready-to-print choice, Halloween Learning Worksheets – 17 Printable Activities lists a Cut & Glue Activity and Printable Cut-Out Pieces among its contents. The digital ZIP/PDF pack uses US Letter paper and is listed for ages 3–8, with different levels of help needed across the pages. The three homemade projects above are separate ideas, not previews of the pack.
Halloween cut-and-paste questions
Can we do these without a printer?
Yes. Draw the pumpkin, mummy or house shapes directly on paper. Colored scraps are useful, but your child can color plain paper before it is cut.
Can preschoolers join in without using scissors?
Yes. An adult can cut every piece while the child chooses colors, arranges the picture and glues. Torn-paper patches also work for the pumpkin. Match the help to the child rather than expecting a particular cutting ability at a particular age.
How do I adapt this for two children?
Give each child a background and a tray of pieces. One can arrange adult-cut shapes while the other draws and cuts their own. They can make the same kind of picture without doing identical steps; our guide to activities for siblings of different ages develops that approach.