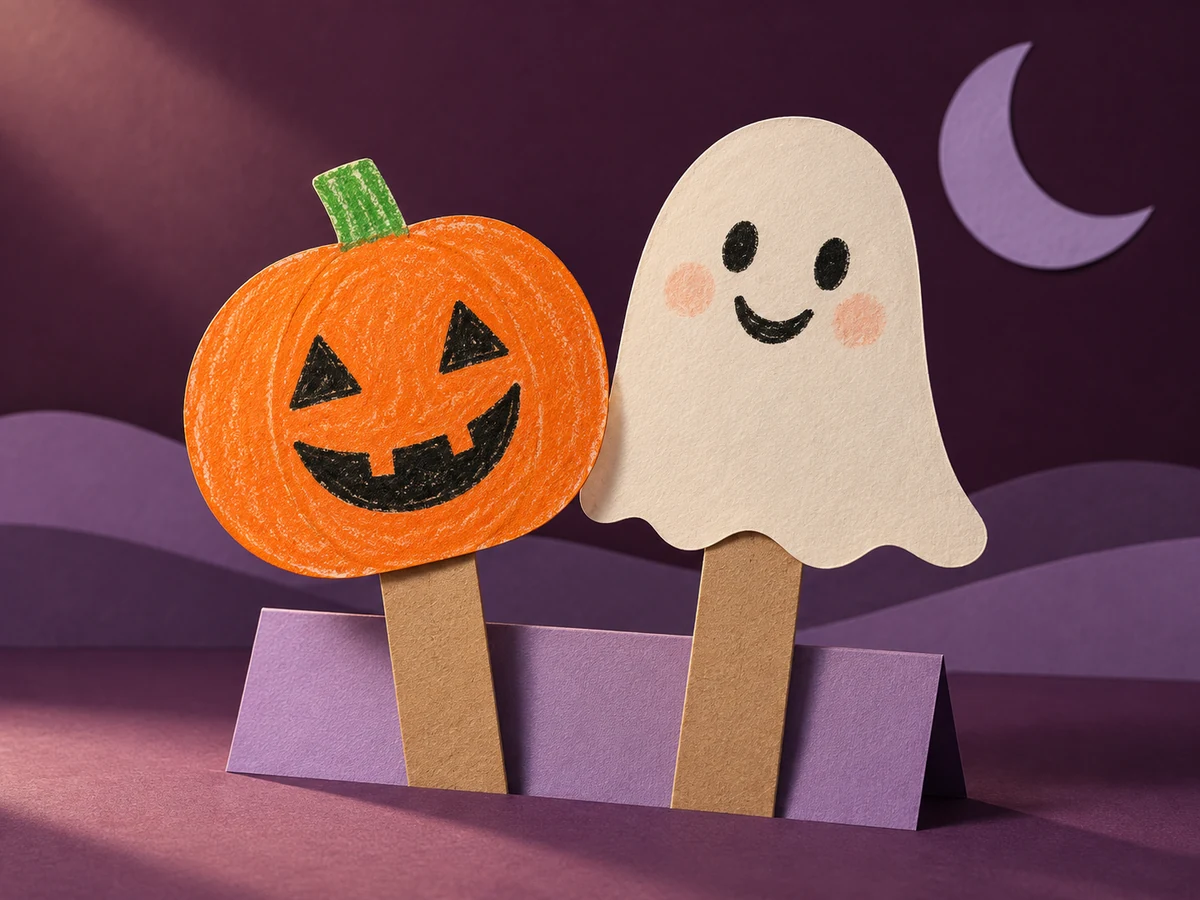
To make Halloween paper puppets, draw or color a simple character, back it with thin card, cut a broad outline and tape a wide card handle to the back. Start with one pumpkin or ghost. You can make the whole puppet from a drawing, so a printer or purchased template is optional.
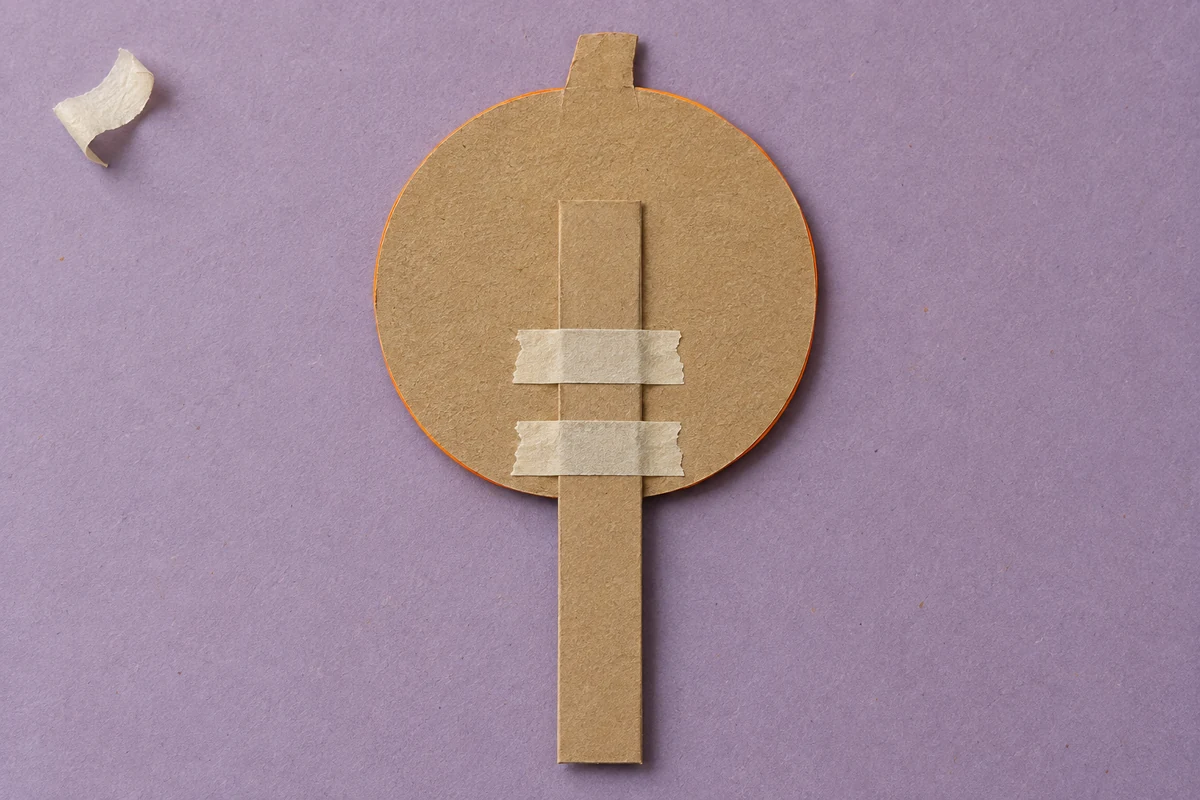
The useful detail is on the back: give the handle enough overlap to support the character. Below, you’ll find four making steps, fixes for floppy paper and a small scene to try when your puppet is ready.
What you need for one paper puppet
- Paper and crayons or washable markers
- Thin card, such as a clean cereal-box panel, for backing and a handle
- Glue suitable for children and masking tape
- Scissors appropriate for the person doing the cutting
- Optional: one printed coloring page with a clear character
Choose supplies labeled for children, follow their instructions and supervise the activity. The U.S. Consumer Product Safety Commission’s Art and Craft Safety Guide explains how to select and use children’s craft materials. Have an adult prepare thick card and any cuts that are difficult for the child.
Set out only enough materials for one character first. A second puppet can wait until you know whether your child would rather keep making or start playing.
Make your Halloween paper puppet in four steps
1. Draw or choose one clear character
Try a pumpkin made from a large circle and a short stem, or a ghost made from a rounded hill with a wavy bottom. Aim for a character about the size of your palm. Draw the eyes and mouth directly on the paper; you don’t need separate tiny pieces.
Color before cutting, while the paper is easy to hold flat. Keep the design simple: a smiling face and one bold color are enough. If you start with a coloring page, choose one character that is easy to separate from the background.
2. Add a thin card backing
Glue the paper onto thin card and let it dry according to the glue instructions before cutting. Use a light, even layer rather than a large wet blob. If you drew directly on card, you can skip the extra backing.
For cereal-box card, put the printed packaging side against the back of your drawing. The plain side will then face the audience if your puppet turns around.
3. Cut a broad outline
Cut around the character with a small border. You don’t have to follow every bump, finger or decoration. A broad oval around a detailed picture works too; leave the character’s face and main shape visible inside it.
An adult can do this step while a younger child chooses a name or adds a face to another drawing. If your child wants to cut, offer a simple outline and help as needed. Detailed cutting is not the goal of this activity.
4. Attach a wide card handle
Cut a card strip about 1 inch wide and 5–6 inches long as a starting point. Lay the puppet face down. Place the strip vertically on its back, with the top extending roughly halfway up the character and the lower end sticking out as a handle.
Add two short strips of masking tape across the handle, spaced apart. Each strip should cross the handle and reach onto the puppet’s back on both sides. Press the tape flat, then turn the puppet over and try a gentle wave. Hold the handle close to the character for more control.
Fix a puppet that bends, twists or comes loose
- The head flops forward: extend the handle farther up the back, or add a small patch of card behind the bending area.
- The whole character turns sideways: try a wider handle and check that both tape strips reach firmly onto the backing.
- The paper curls: let the glue dry fully. If it still curls, make the next character directly on card.
- The handle peels away: replace loose tape and press fresh strips onto a clean, dry backing.
Change one thing, then try the same small wave again. A puppet only needs to hold together for the movements your child wants to make; it doesn’t need a perfect outline.
Using a Halloween coloring page instead of drawing
A coloring page can supply the character if your child would rather color than draw. Print one page first and check the character’s size against your planned handle. Our guide to printing coloring pages can help with page size and printer settings.
If you want a ready-drawn character, the Halloween Coloring Book – 25 Printable Pages is an optional digital coloring-page pack for ages 3–8. It includes 25 unique pages plus a cover in US Letter format. It is not a puppet-template pack; choose a suitable picture and add the backing and handle yourself.
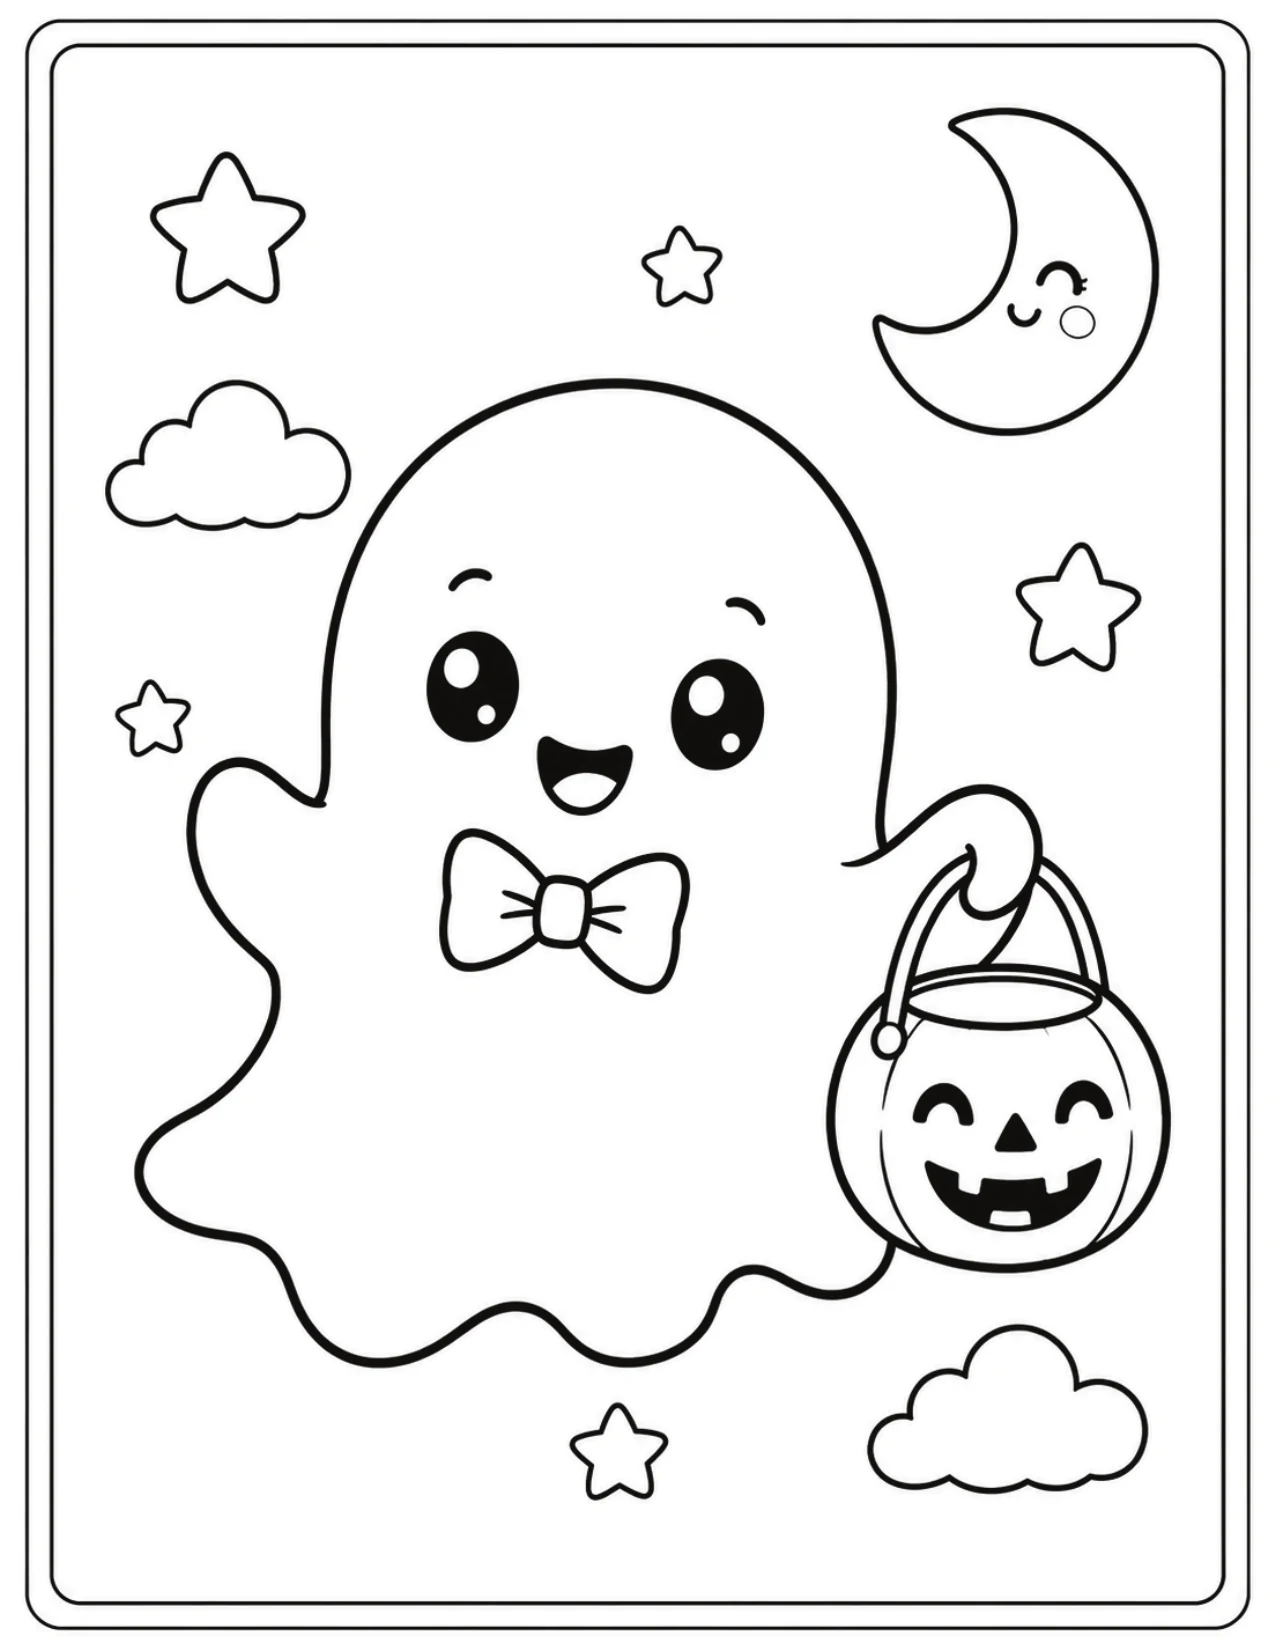
For a detailed picture, keep a broad oval or rectangle around the main character instead of trying to cut every small feature. Background stars or decorations can stay inside that border. Your own pumpkin or ghost drawing works just as well if you prefer a simpler shape.
Give your puppet one small scene
Place a folded piece of paper on the table as a pretend door. Your puppet knocks, introduces itself and asks who lives there. You can answer with another puppet, a voice or a drawing propped against a book.
Let your child choose what happens next: perhaps the ghost has lost a pumpkin, or the pumpkin wants a funny name. Stop after that one exchange if that feels enough. For more ways to begin a story, see our animal storytelling activity. For a different seasonal activity afterward, browse these Halloween activities for preschoolers.
Halloween paper puppet questions
Can we make these without a printer?
Yes. Draw a pumpkin or ghost on paper or thin card, then follow the same cutting and handle steps. A coloring page is an optional starting point, not a requirement.
Can preschoolers join in?
Yes, with adult help matched to the child. They can color, choose a face, name the puppet and try moving it while an adult prepares the card and handles difficult cutting. Offer more of the making steps when the child is ready and interested.
Do we need a puppet theater?
No. Hold the puppet above a table, beside a book or in front of a plain wall. A small conversation between you and the puppet is enough to begin.